实验手册-11-健康检查的应用

目录
实验准备
导入 Docker 镜像
使用XFtp将镜像文件传输到服务器,然后在节点上执行以下命令:
docker load < ./healthcheck.v1.tar查看镜像是否导入成功:
docker images 
给镜像打上标签:
把d89d6523788e换成你自己的镜像ID
docker tag d89d6523788e healthcheck:v1实验任务
任务一:Scale Up 扩容
步骤1 创建配置文件:
vim healthcheck-8.4.1.yaml文件内容:
apiVersion: apps/v1
kind: Deployment
metadata:
  name: web
spec:
  replicas: 3
  selector:
    matchLabels:
      app: web
  template:
    metadata:
      labels:
        app: web
        run: web
    spec:
      containers:
      - name: web
        image: healthcheck:v1
        ports:
        - containerPort: 8080
        readinessProbe:   # 这部分是本节重点
          httpGet:        # 上节我们使用过 exec 这种探测方法
            scheme: HTTP    # 指定协议,HTTP 或 HTTPS
            path: /healthy  # 访问路径
            port: 8080      # 访问端口
          initialDelaySeconds: 10   # 容器启动10秒后开始探测
          periodSeconds: 5          # 每5秒执行一次探测
---
apiVersion: v1
kind: Service
metadata:
  name: web-service
spec:
  selector:
    run: web
  ports:
  - protocol: TCP
    port: 80
    targetPort: 8080
注解:
- 第23
26行:如果 http://container_ip:8080/healthy 的返回代码不是200400,表示容器没有就绪(NotReady) - 第27行
initialDelaySeconds: 10- 容器启动10秒之后才开始探测 - 第28行
periodSeconds: 5- 每隔5秒探测一次(发生3次失败才会从负载均衡中移除,直到下次探测成功重新加入)
步骤2 加载配置文件
kubectl apply -f healthcheck-8.4.1.yaml步骤3 验证
一、查看创建的 Service
kubectl get service
二、查看创建的 Pod
kubectl get pods -o wide
三、访问 Service
接口一
把下面的IP替换成你创建的 Service 的 IP
curl 10.99.139.236:80/healthy
接口二
把下面的IP替换成你创建的 Service 的 IP
curl 10.99.139.236:80/ip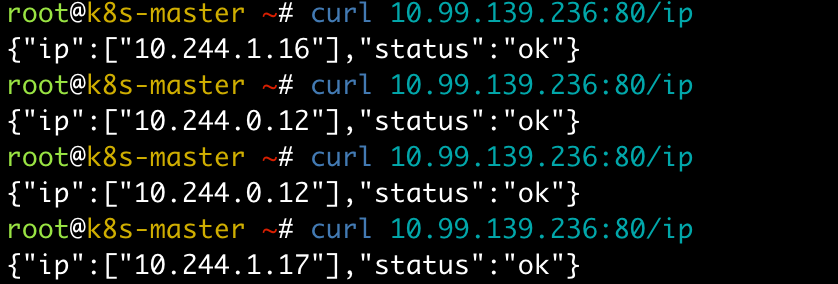
步骤4 修改配置文件,模拟【扩容】场景
将刚才的配置文件复制一份
cp healthcheck-8.4.1.yaml healthcheck-8.4.2.yaml修改配置文件:
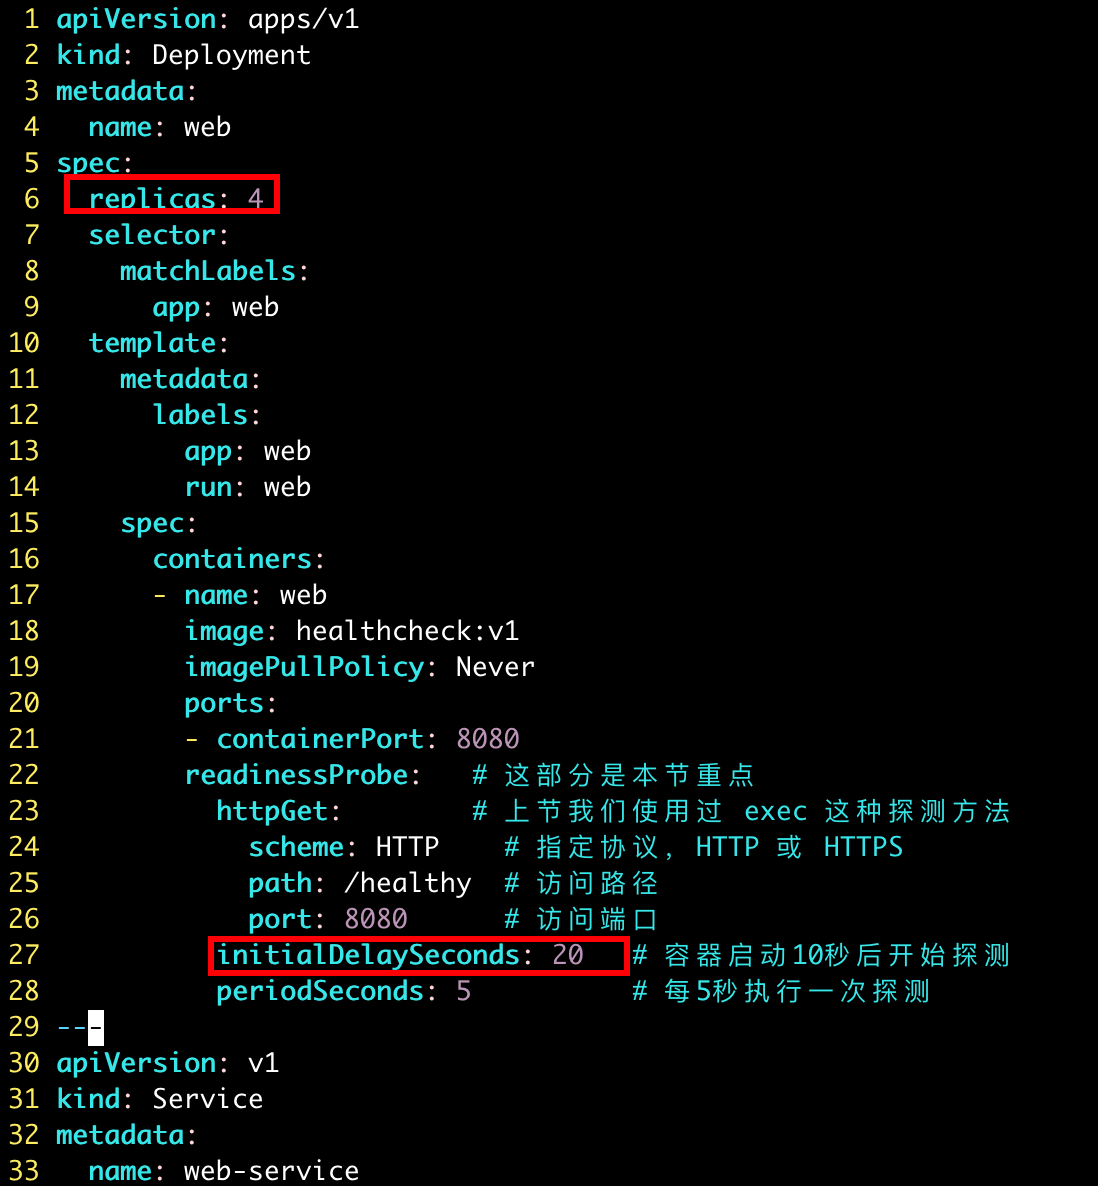
vim healthcheck-8.4.2.yaml修改的地方有两处(仔细检查下,实验手册中的行数和实际中是否相符):
- 修改第6行,将副本数量从3改成4,模拟扩容场景
- 修改第27行,将等待时间从10改成20,方便观察
步骤5 一点准备工作
新开一个 XShell 窗口,连接服务器。
在新窗口中输入以下命令,注意把 IP 换成你创建的 Service 的 IP
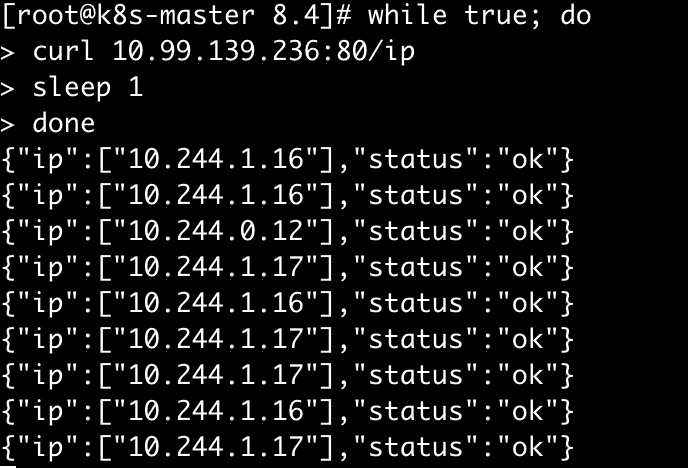
while true; do
   curl 10.99.139.236:80/ip
   sleep 1
done
上面这条命令会每秒执行一次 curl 10.99.139.236:80/ip
步骤5 加载新的配置文件
在旧的 XShell 窗口中执行以下命令,并注意观察新窗口中的变化:
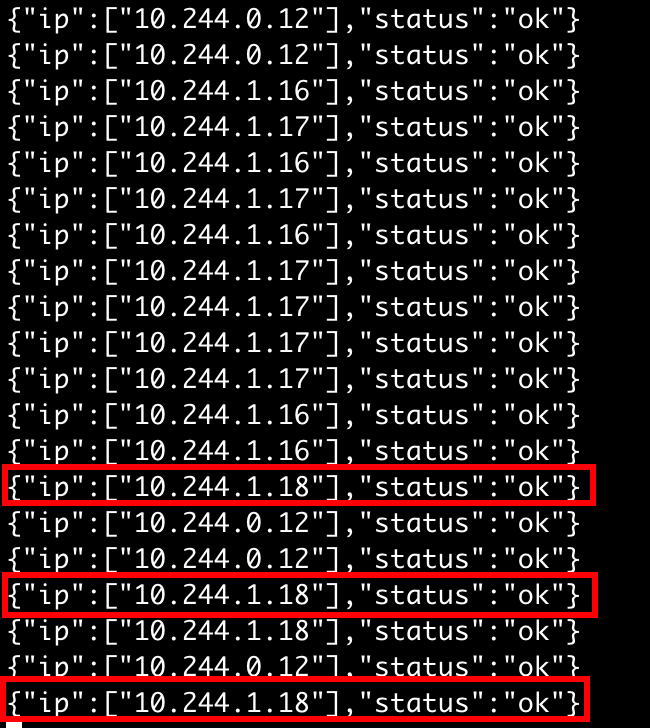
kubectl apply -f healthcheck-8.4.2.yaml
在大概等待20秒后,可以发现新创建的 Pod 加入了工作队列,如下图所示:
任务二:Rolling Update 滚动更新
删除上个任务中创建的资源
kubectl delete -f healthcheck-8.4.2.yaml步骤1 创建配置文件
vim app.v1.yaml文件内容:
apiVersion: apps/v1
kind: Deployment
metadata:
  name: app
spec:
  replicas: 10
  selector:
    matchLabels:
      app: app
  template:
    metadata:
      labels:
        app: app
    spec:
      containers:
      - name: app
        image: busybox
        args:
        - /bin/sh
        - -c
        - sleep 10; touch /tmp/healthy; sleep 30000
        readinessProbe:
          exec:
            command:
            - cat
            - /tmp/healthy
          initialDelaySeconds: 20
          periodSeconds: 5
步骤2 加载配置文件
kubectl apply -f app.v1.yaml查看创建的 pods
kubectl get pods -o wide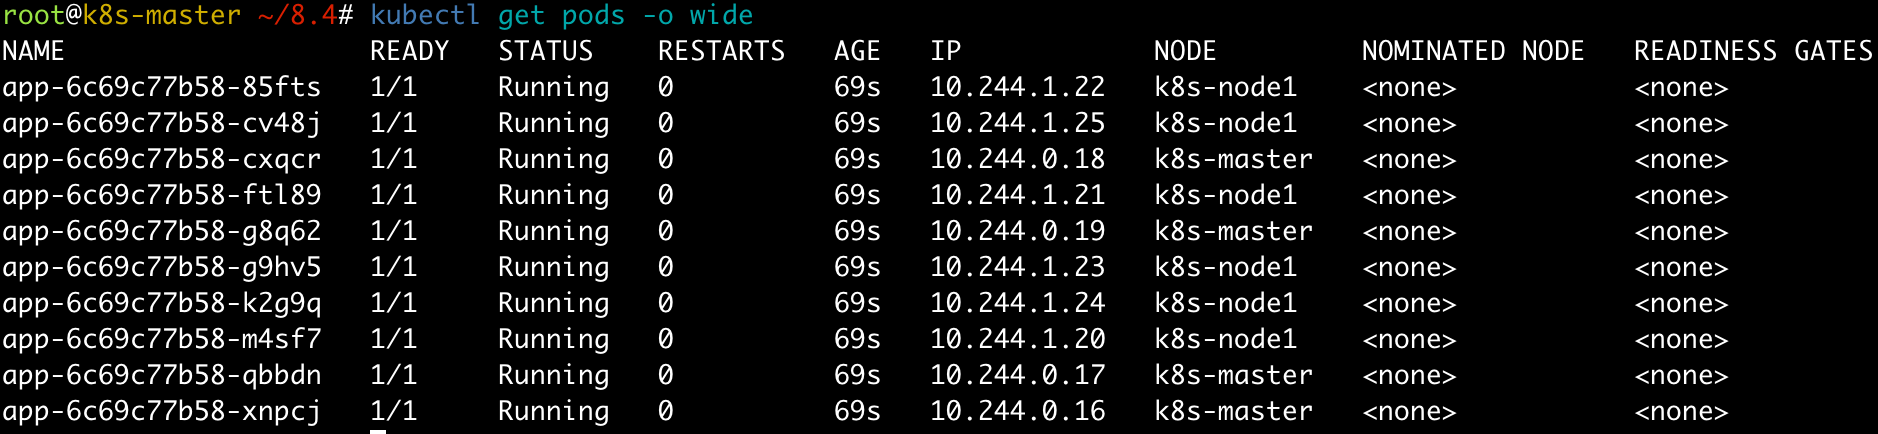
步骤3 修改配置文件
复制一份刚才的配置文件
cp app.v1.yaml app.v2.yaml修改新的配置文件
vim app.v2.yaml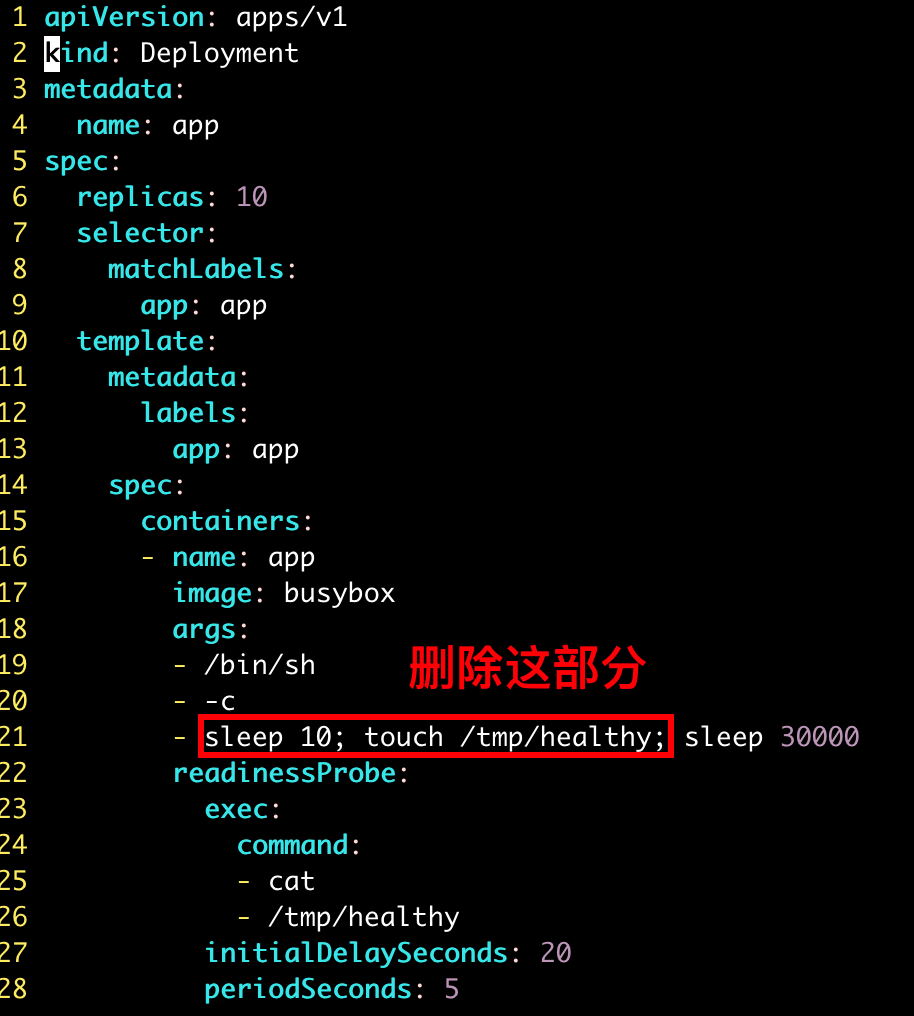
步骤4 加载新的配置文件
kubectl apply -f app.v2.yaml
步骤5 验证
kubectl get pods -o wide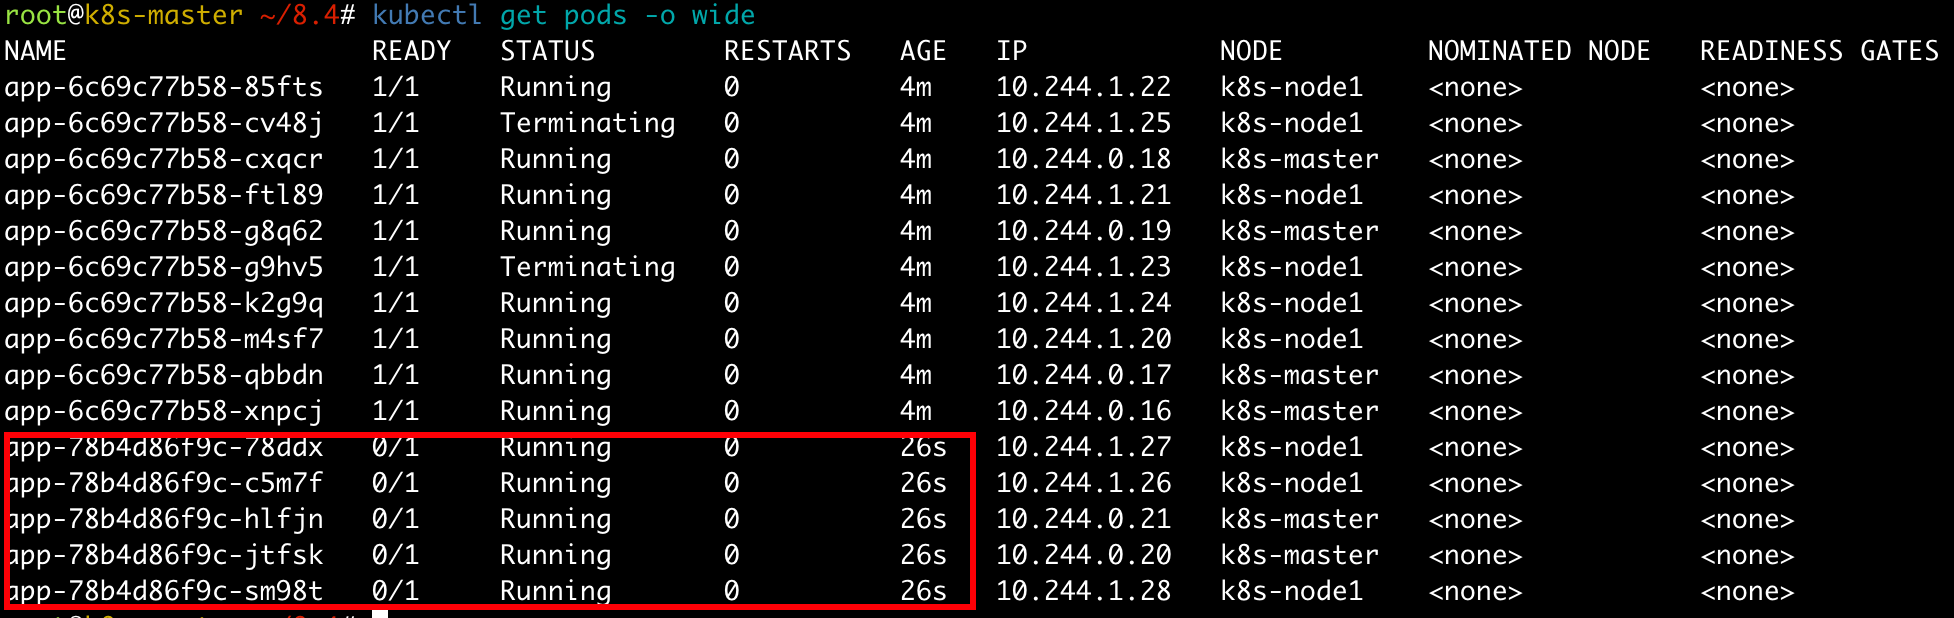
当前有8个状态为 Ready 的 Pod 5个状态为 NotReady 的 Pod 且数量不再变量
我们也可以通过查看 Deployment 来确定以上信息:
kubectl get deployment -o wide
第二列:READY 表示8个是正常的 第三列:UP-TO-DATE 表示5个被更新 第四列:同第二列
以上模拟了更新失败的场景,在这种情况下,健康检查中断了更新,保留了一一定数量的【旧】Pod,保证系统整体的可用。